Saturday, March 15, 2014

Classic Gingerbread Cake

Classic Gingerbread Cake

Published January 1, 2011. From Cook's Illustrated.

Why this recipe works:

Ground ginger, grated fresh ginger, cinnamon, and ground pepper ensured our gingerbread recipe tasted like ginger. Dark stout, heated to minimize its booziness, added a bittersweet flavor to our gingerbread, and replacing butter with vegetable oil allowed the ginger flavor to shine. To keep our gingerbread recipe from sinking in the middle, we incorporated the baking soda with the wet ingredients and roughed up some of the batter to strengthen the flour, giving our gingerbread a more sturdy texture while maintaining its moistness.
less

Makes one 8-inch square cake, serving 8 to 10

This cake packs potent yet well-balanced, fragrant, spicy heat. If you are particularly sensitive to spice, you can decrease the amount of dried ginger to 1 tablespoon. Guinness is the test kitchen's favorite brand of stout. Avoid opening the oven door until the minimum baking time has elapsed. If your cake pan has thin walls, you might want to wrap it with premade cake strips or make your own from cheesecloth and foil. This extra insulation will help ensure that the edges of the cake don't overbake. Serve the gingerbread plain or with lightly sweetened whipped cream. Leftovers can be wrapped in plastic wrap and stored at room temperature for 2 days.

Ingredients

  • 3/4 cup stout (see note)
  • 1/2 teaspoon baking soda
  • 2/3 cup mild molasses
  • 3/4 cup (5 1/4 ounces) packed light brown sugar
  • 1/4 cup (1 3/4 ounces) granulated sugar
  • 1 1/2 cups (7 1/2 ounces) unbleached all-purpose flour, plus extra for dusting pan
  • 2 tablespoons ground ginger (see note)
  • 1/2 teaspoon baking powder
  • 1/2 teaspoon table salt
  • 1/4 teaspoon ground cinnamon
  • 1/4 teaspoon finely ground black pepper
  • 2 large eggs
  • 1/3 cup vegetable oil
  • 1 tablespoon finely grated fresh ginger

Instructions

  1. 1. Adjust oven rack to middle position and heat oven to 350 degrees. Grease and flour 8-inch square baking pan.
    2. Bring stout to boil in medium saucepan over medium heat, stirring occasionally. Remove from heat and stir in baking soda (mixture will foam vigorously). When foaming subsides, stir in molasses, brown sugar, and granulated sugar until dissolved; set mixture aside. Whisk flour, ground ginger, baking powder, salt, cinnamon, and pepper together in large bowl; set aside.
    3. Transfer stout mixture to large bowl. Whisk in eggs, oil, and grated ginger until combined. Whisk wet mixture into flour mixture in thirds, stirring vigorously until completely smooth after each addition.
    4. Transfer batter to prepared pan and gently tap pan against counter 3 or 4 times to dislodge any large air bubbles. Bake until top of cake is just firm to touch and toothpick inserted into center comes out clean, 35 to 45 minutes. Cool cake in pan on wire rack, about 11/2 hours. Cut into squares and serve warm or at room temperature.

Cooking Class

Not So Gingerly with Gingerbread

Most cake batters require a gentle touch to avoid developing glutens in the flour and, thus, a tough crumb. But vigorous stirring actually gave our super-wet gingerbread batter the structure necessary to keep the center from collapsing.
GENTLY STIRRED BATTER = SUNKEN CAKE CENTER

Shopping

Keys to Richer, Zingier Flavor

BITTERSWEET BEER
Dark stout contributes deep, caramelized notes.
FLAVOR-FREE FAT
Clean, neutral-tasting oil brings key flavors into clear relief.
A ROOTY BOOST
Fresh ginger kicks up the fiery, pungent notes of dried ginger.
BACKSEAT SPICES
Black pepper and cinnamon complement—without overwhelming—the ginger.

Step-by-Step

Insulating Cake Strip: Home Edition

Cake strips promote more even baking, preventing doming and cracking as well as keeping the edges of a cake from overbaking. This extra insulation is particularly important if the walls of your pan are thin.
1. SOAK STRIP Soak 2 by 32-inch piece of cheesecloth or folded newspaper with water. Gently wring out excess water.
2. FOLD IN FOIL Place damp strip at bottom of 36-inch length of foil. Repeatedly fold foil over dampened strip to cover to make 2 by 36-inch strip.
3. WRAP AROUND PAN Mold insulating strip around pan and pinch ends together to seal.
4. SECURE To ensure insulating strip stays in place around pan, secure with twine.

Skillet Soda Bread

Skillet Soda Bread

From America's Test Kitchen Season 9: Breadmaking, Simplified

Why this recipe works:

Authentic Irish soda bread has a tender, dense crumb and a rough-textured, thick crust—definitely a departure from the more common Americanized soda bread, which is closer to a supersized scone. We wanted to try our hand at the authentic version of this bread, which relies on a simple ingredient list of flour, baking soda, salt, and buttermilk.
Our first tests focused on flour. A loaf made with all-purpose flour produced a doughy, heavy bread with an overly thick crust. To soften the crumb, we added some cake flour to the mix, and this made a difference. (It also made historical sense. Because of Ireland’s climate, the wheat grown there is a soft, low-protein variety more similar to cake flour than to American all-purpose, which is relatively high in protein.) A version made with all cake flour, however, was heavy and compact. A ratio of 3 parts all-purpose flour to 1 part cake flour proved best. With only the four basic ingredients of flour, buttermilk, baking soda, and salt, our bread was lacking in flavor and still a little tough; we turned to sugar and butter. Traditionally, very small amounts of butter and sugar are sometimes added to Irish soda bread, so we felt justified in using a minuscule amount of each. The sugar added flavor without making the bread sweet, and the butter softened the dough just enough without making it overly rich.
less

Makes 1 loaf

If you do not have a cast iron pan the bread can be baked on a baking sheet although the crust won’t be quite as crunchy. Soda bread is best eaten on the day it is baked but does keep well covered and stored at room temperature for a couple of days after which time it will become dry.

Ingredients

  • 3 cups all-purpose flour
  • 1 cup cake flour
  • 1 1/2 teaspoons baking soda
  • 1 1/2 teaspoons cream of tartar
  • 1 1/2 teaspoons salt
  • 2 tablespoons sugar
  • 2 tablespoons unsalted butter, softened
  • 1 1/2 cups low-fat buttermilk
  • 1 tablespoon melted butter, optional

Instructions

  1. 1. Heat the oven to 400 degrees and adjust a rack to the center position. Place the flours, soda, cream of tartar, salt and sugar in a large mixing bowl. Add the butter and rub it into the flour using your fingers until it is completely incorporated and the mixture resembles coarse crumbs. Make a well in the center and add the buttermilk. Work the liquid into the flour mixture using a fork until the dough comes together in large clumps. Turn the dough onto a work surface and knead briefly until the loose flour is just moistened. The dough will still be scrappy and uneven.
    2. Form the dough into a round about 6 to 7 inches in diameter and place in a cast iron skillet. Score a deep cross on top of the loaf and place in the heated oven. Bake until nicely browned and a tested comes out clean when inserted into the center of the loaf, about 40 to 45 minutes. Remove from oven and brush with a tablespoon of melted butter if desired. Cool for at least 30 minutes before slicing. Serve slightly warm or at room temperature.

Corned Beef and Cabbage

Corned Beef and Cabbage

From Cook's Country | February/March 2012

Why this recipe works:

Corned beef and cabbage makes its way to the dinner table (in this country, anyway) but once a year in celebration of St. Patrick’s Day, and maybe for good reason. This meat can be unbearably salty, dry, and rubbery. And when cooked with the stale spice packet that often gets packaged with the meat, it’s flavorless at best. The accompanying vegetables are usually mushy, greasy, and monotone in flavor. To solve the dry, stringy meat texture, we got rid of the typical stovetop simmer and moved a covered pot into a low-temperature oven for gentler cooking. To help flavor the meat, we replaced some of the water with chicken broth and added celery, carrot, and onion, along with peppercorns, allspice, a bay leaf, and thyme, to the cooking liquid. For the cabbage, carrots, and potatoes typically served with the corned beef, we strained and defatted the cooking liquid and then cooked the vegetables in stages––potatoes first, then carrots and cabbage. A little butter added to the pot helped flavor the vegetables.
less

Serves 6 to 8

Use flat-cut corned beef brisket, not point-cut; it’s more uniform in shape and thus will cook more evenly. When slicing the cabbage, leave the core intact or the cabbage will fall apart during cooking.

Ingredients

  • 1 (4- to 5-pound) corned beef brisket roast, rinsed, fat trimmed to 1/4 inch thick
  • 4 cups low-sodium chicken broth
  • 4 cups water
  • 12 carrots, peeled (3 chopped, 9 halved crosswise)
  • 2 celery ribs, chopped
  • 1 onion, peeled and quartered
  • 3 bay leaves
  • 1 tablespoon whole black peppercorns
  • 1 tablespoon minced fresh thyme
  • 1 teaspoon whole allspice
  • 3 tablespoons unsalted butter
  • 1 1/2 pounds small red potatoes
  • 1 head green cabbage (2 pounds), cut into 8 (2-inch) wedges
  • Pepper

Instructions

  1. 1. Adjust oven rack to middle position and heat oven to 300 degrees. Combine beef, broth, water, chopped carrots, celery, onion, bay leaves, peppercorns, thyme, and allspice in Dutch oven. Cover and bake until fork slips easily in and out of meat, 4½ to 5 hours.
    2. Transfer meat to 13 by 9-inch baking dish. Strain cooking liquid through fine-mesh strainer into large bowl, discard solids, and skim fat from liquid. Pour 1 cup cooking liquid over meat. Cover dish tightly with aluminum foil and let rest for 30 minutes.
    3. Meanwhile, return remaining cooking liquid to Dutch oven, add butter, and bring to simmer over medium-high heat. Add potatoes and simmer until they begin to soften, about 10 minutes. Add carrot halves and cabbage, cover, and cook until tender, 10 to 15 minutes. Transfer vegetables to serving platter and season with pepper to taste. (Reserve cooking liquid for making Creamed Chipped Beef using leftover corned beef; recipe at right.)
    4. Transfer beef to carving board and slice against grain into ¼-inch-thick slices. Serve with vegetables.
    TO MAKE AHEAD: Prepare corned beef through step 2. Refrigerate moistened beef and cooking liquid separately for up to 24 hours. To serve, adjust oven rack to middle position and heat oven to 350 degrees. Transfer meat to carving board and slice against grain into ¼-inch-thick slices and return to baking dish. Cover dish tightly with foil and bake until meat is heated through, about 25 minutes. While meat is heating, proceed with step 3.

Divide and Conquer

Oven Braise

Oven Braise
We braise the beef for hours in low, even oven heat with chicken broth, spices, and vegetables for flavor.

Stovetop Simmer

Stovetop Simmer
As the meat rests, we briefly cook fresh vegetables in the braising liquid so they'll retain their flavor and texture.

Friday, December 13, 2013

Skillet Burgers with Sautéed Onions and Horseradish Sauce

Skillet Burgers with Sautéed Onions and Horseradish Sauce

From Cook's Country | December/January 2012

Why this recipe works:

Ground beef seasoned with garlic, salt and pepper makes for flavorful burgers, and a quick sear in a hot skillet brings them to a perfect medium-rare in minutes. To finish, a garnish of horseradish sauce and charred onions dresses up these simple indoor burgers.

Serves 4

Horseradish sauce and charred onions dress up these simple indoor burgers.

Ingredients

  • 1/4 cup sour cream
  • 1 1/2 tablespoons prepared horseradish
  • 1 tablespoon minced fresh chives
  • 2 teaspoons lemon juice
  • Salt and pepper
  • 1 1/2 pounds 85 percent lean ground beef
  • 3 garlic cloves, minced
  • 1 tablespoon vegetable oil
  • 1 onion, halved and sliced thin
  • 4 hamburger buns

Instructions

  1. 1. Combine sour cream, horseradish, chives, and lemon juice in bowl. Season with salt and pepper to taste; set aside. Gently knead beef, garlic, ½ teaspoon salt, and ¼ teaspoon pepper together in large bowl until well combined. Shape into four ¾-inch-thick patties and press shallow divot in center of each.
    2. Heat oil in 12-inch nonstick skillet over medium-high heat until just smoking. Add patties and cook until well browned and meat registers 120 to 125 degrees (for medium-rare), 3 to 4 minutes per side. Transfer burgers to plate and tent loosely with aluminum foil.
    3. Pour off all but 1 tablespoon fat from pan. Cook onion over medium-high heat until browned, 6 to 8 minutes. Place burgers on bun bottoms and top with onions and horseradish sauce. Serve.

New England Fish Chowder

New England Fish Chowder

Published January 1, 2012. From Cook's Illustrated

Why this recipe works:

Most modern fish chowders are so rich with cream that you can hardly taste the fish. We wanted a chowder with a delicate, clean-tasting broth. We started by gently poaching flaky cod in water flavored with salt pork, onions, and herbs, which created a quick fish stock. To this stock we… read more

Serves 6 to 8

Haddock, or other flaky white fish, may be substituted for cod. Garnish the chowder with minced fresh chives, crisp bacon bits, or oyster crackers.

Ingredients

  • 2 tablespoons unsalted butter
  • 2 onions, cut into 1/2-inch dice
  • 4 ounces salt pork, rind removed, rinsed, and cut into 2 pieces
  • 1 1/2 teaspoons minced fresh thyme
  • Salt and pepper
  • 1 bay leaf
  • 5 cups water
  • 2 pounds skinless cod fillets, sliced crosswise into 6 equal pieces
  • 1 1/2 pounds Yukon Gold potatoes, peeled and cut into 1/2-inch dice
  • 2 cups whole milk
  • 1 tablespoon cornstarch

Instructions

1. Melt butter in Dutch oven over medium heat. Add onions, salt pork, thyme, ¾ teaspoon salt, and bay leaf; cook, stirring occasionally, until onions are softened but not browned, 3 to 5 minutes. Add water and bring to simmer. Remove pot from heat, gently place cod fillets in water, cover, and let fish stand until opaque and nearly cooked through, about 5 minutes. Using metal spatula, transfer cod to bowl.
2. Return pot to medium-high heat, add potatoes, and bring to simmer. Cook until potatoes are tender and beginning to break apart, about 20 minutes.
3. Meanwhile, whisk milk, cornstarch, and ½ teaspoon pepper together in bowl. Stir milk mixture into chowder and return to simmer. Return fish and any accumulated juices to pot. Remove pot from heat, cover, and let stand for 5 minutes. Remove and discard salt pork and bay leaf. Stir gently with wooden spoon to break fish into large pieces. Season with salt and pepper to taste. Serve immediately.

Herbed Roast Beef

Herbed Roast Beef

From Cook's Country | December/January 2010

Why this recipe works:

A luxurious, crunchy bread-crumb crust is great for a tenderloin, but it fell apart when we tried to slice our Herbed Roast Beef thin. Instead of a crust, we developed an herb mustard spread and discovered a way to incorporate it directly into the roast. As the herb butter lay on the resting… read more

Serves 6 to 8

For even deeper seasoning, refrigerate the roast overnight after filling it with the herb mixture in step 2.

Ingredients

  • 1/3 cup finely chopped fresh parsley
  • 2 tablespoons minced fresh thyme
  • 1 shallot, minced
  • 1 tablespoon Dijon mustard
  • 2 tablespoons olive oil
  • 4 tablespoons unsalted butter, softened
  • 1 (4-pound) top sirloin roast, fat trimmed to 1/4 inch thick
  • 1 tablespoon salt
  • 1 tablespoon pepper

Instructions

  1. 1. PREP HERBS Combine parsley, thyme, and shallot in bowl. Transfer 2 tablespoons herb mixture to another bowl and stir in mustard and 1 tablespoon oil until combined. Add butter to remaining herb mixture and mash with fork until combined.
    2. PREP BEEF Butterfly roast and rub inside and out with salt and pepper. Spread herb-mustard mixture over interior of meat and tie securely with kitchen twine at 1-inch intervals. Refrigerate at least 1 hour or up to 24 hours.
    3. BROWN AND ROAST Adjust oven rack to middle position and heat oven to 275 degrees. Pat roast dry with paper towels. Heat remaining oil in large skillet over medium-high heat until just smoking. Brown roast all over, 8 to 12 minutes, then arrange on V-rack set inside roasting pan. Transfer to oven and roast until meat registers 125 degrees (for medium-rare), 1 1/2 to 2 hours.
    4. BUTTER AND REST Transfer roast to carving board, spread with herb-butter mixture, tent with foil, and let rest 20 minutes. Remove kitchen twine. Slice roast crosswise against grain into 1/4-inch-thick slices. Serve.

Herbs Galore

Fresh parsley and thyme flavor both the interior and exterior of our roast.
1. Butterfly the roast by slicing horizontally through the middle of the meat. Leave about 1/2 inch of meat intact, then open it like a book.
2. After seasoning the meat, spread the herb-mustard mixture over the interior of the meat.
3. Fold the meat back to its original position, then tie securely at 1-inch intervals with kitchen twine.
4. For a second hit of herb flavor after the roast is cooked, spread it with herb butter.

Fast Sear, Slow Roast for Beef

To promote browning when roasting beef, you want the oven to be very hot. Unfortunately, even if you remove the roast when the center is pink, you'll find a thick, unsightly band of gray, overcooked meat at its edge; a low temperature does a better job of cooking the meat evenly. So we brown most beef roasts on the stovetop to build a flavorful crust, then roast them gently for a uniformly rosy, juicy interior.
1. Searing the roast assures a flavorful, deep brown crust.
2. Roasting at a low temperature (275 degrees) keeps the meat moist and succulent.

Ginger Snaps ATK

Makes 80 1½-inch cookies

For the best results, use fresh spices. For efficiency, form the second batch of cookies while the first batch bakes. And no, the 2 teaspoons of baking soda is not a mistake; it’s essential to getting the right texture.

Ingredients

  • 2 1/2 cups (12 1/2 ounces) all-purpose flour
  • 2 teaspoons baking soda
  • 1/2 teaspoon salt
  • 12 tablespoons unsalted butter
  • 2 tablespoons ground ginger
  • 1 teaspoon ground cinnamon
  • 1/4 teaspoon ground cloves
  • 1/4 teaspoon pepper
  • pinch cayenne
  • 1 1/4 cups packed (8 3/4 ounces) dark brown sugar
  • 1/4 cup molasses
  • 2 tablespoons finely grated fresh ginger
  • 1 large egg plus 1 large yolk
  • 1/2 cup (3 1/2 ounces) granulated sugar

Instructions

  1. 1. Whisk flour, baking soda, and salt together in bowl. Heat butter in 10-inch skillet over medium heat until melted. Lower heat to medium-low and continue to cook, swirling pan frequently, until foaming subsides and butter is just beginning to brown, 2 to 4 minutes. Transfer butter to large bowl and whisk in ground ginger, cinnamon, cloves, pepper, and cayenne. Cool slightly, about 2 minutes. Add brown sugar, molasses, and fresh ginger to butter mixture and whisk to combine. Add egg and yolk and whisk to combine. Add flour mixture and stir until just combined. Cover dough tightly with plastic wrap and refrigerate until firm, about 1 hour.
    2. Adjust oven racks to upper-middle and lower-middle positions and heat oven to 300 degrees. Line 2 baking sheets with parchment paper. Place granulated sugar in shallow baking dish or pie plate. Divide dough into heaping teaspoon portions; roll dough into 1-inch balls. Working in batches of 10, roll balls in sugar to coat. Evenly space dough balls on prepared baking sheets, 20 dough balls per sheet.
    3. Place 1 sheet on upper rack and bake for 15 minutes. After 15 minutes, transfer partially baked top sheet to lower rack, rotating 180 degrees, and place second sheet of dough balls on upper rack. Continue to bake until cookies on lower tray just begin to darken around edges, 10 to 12 minutes longer. Remove lower sheet of cookies and shift upper sheet to lower rack and continue to bake until cookies begin to darken around edges, 15 to 17 minutes. Slide baked cookies, still on parchment, to wire rack and cool completely before serving. Cool baking sheets slightly and repeat step 2 with remaining dough balls.
    TO MAKE AHEAD: Dough can be refrigerated for up to 2 days or frozen for up to 1 month. Let dough stand at room temperature for 30 minutes before shaping. Let frozen dough thaw overnight in the refrigerator before proceeding with recipe. Cooled cookies can be stored at room temperature for up to 2 weeks in airtight container.

Technique

Loading Up On Leavening

Using a full 2 teaspoons of baking soda in our cookie dough instead of the more typical ½ to 1 teaspoon not only helped create desirable fissures in the final cookie but also helped it dry out. Baking soda is an alkaline substance that weakens the gluten (the network of proteins that gives most baked goods their structure) in a dough or batter. Weaker gluten means a more porous structure from which air bubbles and moisture can burn off. It also means that the dough will collapse after its initial rise in the oven, leading to cracks that also allow more moisture to escape.

Technique

Putting the Snap in Gingersnaps

The hallmark of gingersnap cookie texture—big crunch—came down to one key factor: drying out the dough.

BROWN THE BUTTER Butter is 16 percent water. Browning it before whisking it with the sugar, eggs, and flour eliminates moisture.

CUT BACK ON SUGAR The brown sugar in our recipe holds on to water, even after baking. Our solution? Use just 1 1/4 cups.

TURN DOWN THE OVEN Baking the cookies in a low (300-degree) oven gives the dough ample time to gradually—but thoroughly—dry out.

STAGGER THE BAKING Baking each tray on the top rack before moving it to the cooler bottom rack creates fissures that allow moisture to escape.

Thursday, October 24, 2013

Hermit Cookies

Why this recipe works:
Most recipes for Hermit Cookies we tested involved creaming the butter, but this produced dry, biscuitlike cookies. Melting the butter delivered a chewier, moister cookie. We took melting one step further by cooking the butter in a saucepan until light brown and fragrant, which added a nutty flavor to the hermits. Tasters settled on the simple, yet potent, combination of cinnamon, allspice, and ginger. Adding these spices to the browned butter bloomed their natural flavor, which allowed us to use less. This avoided a dusty texture from too much ground spice. We steeped the raisins in melted butter to soften them, and pureed them with crystallized ginger into a rough paste. This helped distribute raisin flavor into every bite, while the pureed ginger lent pungent sweetness and chew. When it came to shaping them, we found that hermits baked in logs and then sliced were much chewier and moister. (less)

Makes about 18 cookies

For this recipe, we prefer using mild (or light) molasses instead of the robust or blackstrap varieties.

Ingredients

  • 1 cup raisins
  • 2 tablespoons finely chopped crystallized ginger
  • 8 tablespoons unsalted butter
  • 1 teaspoon ground cinnamon
  • 1/4 teaspoon ground allspice
  • 2 cups (10 ounces) all-purpose flour
  • 1/2 teaspoon baking soda
  • 1/2 teaspoon salt
  • 3/4 cup packed (5 1/4 ounces) dark brown sugar
  • 1/2 cup molasses
  • 2 large eggs
  • 1 1/2 tablespoons orange juice
  • 3/4 cup (3 ounces) confectioners' sugar

Instructions

  1. 1. Adjust oven racks to upper-middle and lower-middle positions and heat oven to 350 degrees. Line 2 baking sheets with parchment paper. Process raisins and ginger in food processor until mixture sticks together and only small pieces remain, about 10 seconds. Transfer mixture to large bowl.
  2. 2. Heat butter in small saucepan over medium-low heat, swirling pan occasionally, until nutty brown in color, about 10 minutes. Stir in cinnamon and allspice and cook until fragrant, about 15 seconds. Stir butter mixture into raisin mixture until well combined; let cool to room temperature.
  3. 3. Combine flour, baking soda, and salt in bowl. Stir brown sugar, molasses, and eggs into cooled butter-raisin mixture until incorporated. Fold in flour mixture (dough will be very sticky) and refrigerate, covered, until firm, at least 1 1/2 hours or up to 24 hours.
  4. 4. Divide dough into quarters. Transfer 1 piece of dough to lightly floured surface and roll into 10-inch log. Transfer to prepared sheet and use ruler to neatly square off sides. (Each sheet will contain 2 logs.) Repeat with remaining dough. Bake until only shallow indentation remains on edges when touched (center will appear slightly soft), 15 to 20 minutes, switching and rotating sheets halfway through baking. Let logs cool on baking sheets for 5 minutes; transfer parchment to wire racks and let cool completely.
  5. 5. Whisk orange juice and confectioners’ sugar in small bowl until smooth. Drizzle glaze onto cooled logs and let sit until glaze hardens, about 15 minutes. Cut logs into 2-inch bars and serve.

Monday, October 21, 2013

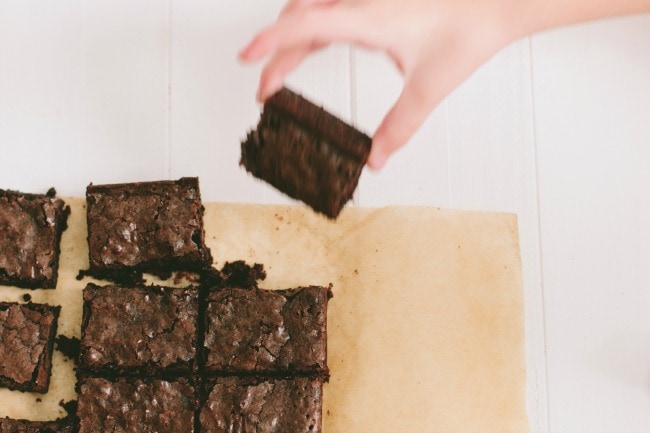
Really Good Brownies

Really Good Brownies
America’s Test Kitchen
Makes twenty-four 2-inch brownies
For the chewiest texture, it is important to let the brownies cool thoroughly before cutting. If your baking dish is glass, cool the brownies 10 minutes, then remove them promptly from the pan (otherwise, the superior heat retention of glass can lead to overbaking). While any high-quality chocolate can be used in this recipe, our preferred brands of bittersweet chocolate are Callebaut Intense Dark Chocolate L-60-40NV and Ghirardelli Bittersweet Chocolate Baking Bar. Our preferred brand of unsweetened chocolate is Scharffen Berger. Leftovers can be stored in an airtight container at room temperature for up to 4 days.
1/3 (1 ounce) cup Dutch-processed cocoa
1 1/2 teaspoons instant espresso (optional)
1/2 cup plus 2 tablespoons boiling water
2 ounces unsweetened chocolate, finely chopped (see note)
4 tablespoons (½ stick) unsalted butter, melted
1/2 cup plus 2 tablespoons vegetable oil
2 large eggs
2 large egg yolks
2 teaspoons vanilla extract
2 1/2 cups (17½ ounces) sugar
1 3/4 cups (8¾ ounces) unbleached all-purpose flour
3/4 teaspoon table salt
6 ounces bittersweet chocolate, cut into ½-inch pieces (see note)
1. Adjust oven rack to lowest position and heat oven to 350 degrees. Make a foil sling using the following steps: Cut 18-inch length foil and fold lengthwise to 8-inch width. Fit foil into length of 13 by 9-inch baking pan, pushing it into corners and up sides of pan; allow excess to overhang pan edges. Cut 14-inch length foil and fit into width of pan in the same manner, perpendicular to the first sheet (if using extra-wide foil, fold second sheet lengthwise to 12-inch width). Spray with nonstick cooking spray.
2. Whisk cocoa, espresso powder (if using), and boiling water together in large bowl until smooth. Add unsweetened chocolate and whisk until chocolate is melted. Whisk in melted butter and oil. (Mixture may look curdled.) Add eggs, yolks, and vanilla and continue to whisk until smooth and homogeneous. Whisk in sugar until fully incorporated. Add flour and salt and mix with rubber spatula until combined. Fold in bittersweet chocolate pieces.
3. Scrape batter into prepared pan and bake until toothpick inserted halfway between edge and center comes out with just a few moist crumbs attached, 30 to 35 minutes. Transfer pan to wire rack and cool 1½ hours.
4. Using foil overhang, lift brownies from pan. Return brownies to wire rack and let cool completely, about 1 hour. Cut into 2-inch squares and serve.
really good brownies + a giveaway | the vanilla bean blog

Thursday, October 17, 2013

German Chocolate Cake with Coconut-Pecan Filling

Published January 1, 2005.  
Serves 12 to 16.  

Why this recipe works:

We wanted a streamlined German chocolate cake recipe that would be less sweet and more chocolaty than the original. After testing, we discovered that the texture of the cake actually improved when we used whole eggs instead of laboriously separating the eggs, beating the whites, and folding them into the batter. We enhanced the chocolate flavor with a combination of cocoa powder and high-quality semisweet or bittersweet chocolate. Finally, we adjusted the level and proportions of the sugar (both brown and white) and butter in the cake and filling, and toasted the pecans, for a German chocolate cake that was easier to make and had better texture and flavor than the original.
When you assemble the cake, the filling should be cool or cold (or room temperature, at the very warmest). To be time-efficient, first make the filling, then use the refrigeration time to prepare, bake, and cool the cakes. The toasted pecans are stirred into the filling just before assembly to keep them from becoming soft and soggy.

Ingredients

  • Filling
  • 4 egg yolks
  • 1can evaporated milk (12 ounces)
  • 1cup granulated sugar (7 ounces)
  • 1/4cup packed light brown sugar (1 3/4 ounces)
  • 6tablespoons unsalted butter (3/4 stick), cut into 6 pieces
  • 1/8teaspoon table salt
  • 2teaspoons vanilla extract
  • 2 1/3cups sweetened shredded coconut (7 ounces)
  • 1 1/2cups finely chopped pecans (6 1/2 ounces), toasted on baking sheet in 350-degree oven until fragrant and browned, about 8 minutes
  • Cake
  • 4ounces semisweet or bittersweet chocolate , chopped fine
  • 1/4cup Dutch-processed cocoa , sifted
  • 1/2cup boiling water
  • 2cups unbleached all-purpose flour (10 ounces), plus additional for dusting cake pans
  • 3/4teaspoon baking soda
  • 12tablespoons unsalted butter (1 1/2 sticks), softened
  • 1cup granulated sugar (7 ounces)
  • 2/3cup packed light brown sugar (about 4 3/4 ounces)
  • 3/4teaspoon table salt
  • 4 large eggs , room temperature
  • 1teaspoon vanilla extract
  • 3/4cup sour cream , room temperature

Instructions

  1. 1. FOR THE FILLING: Whisk yolks in medium saucepan; gradually whisk in evaporated milk. Add sugars, butter, and salt and cook over medium-high heat, whisking constantly, until mixture is boiling, frothy, and slightly thickened, about 6 minutes. Transfer mixture to bowl, whisk in vanilla, then stir in coconut. Cool until just warm, cover with plastic wrap, and refrigerate until cool or cold, at least 2 hours or up to 3 days. (Pecans are stirred in just before cake assembly.)
  2. 2. FOR THE CAKE: Adjust oven rack to lower-middle position; heat oven to 350 degrees. Combine chocolate and cocoa in small bowl; pour boiling water over and let stand to melt chocolate, about 2 minutes. Whisk until smooth; set aside until cooled to room temperature.
  3. 3. Meanwhile, spray two 9-inch-round by 2-inch-high straight-sided cake pans with nonstick cooking spray; line bottoms with parchment or waxed paper rounds. Spray paper rounds, dust pans with flour, and knock out excess. Sift flour and baking soda into medium bowl or onto sheet of parchment or waxed paper.
  4. 4. In bowl of standing mixer, beat butter, sugars, and salt at medium-low speed until sugar is moistened, about 30 seconds. Increase speed to medium-high and beat until mixture is light and fluffy, about 4 minutes, scraping down bowl with rubber spatula halfway through. With mixer running at medium speed, add eggs one at a time, beating well after each addition and scraping down bowl halfway through. Beat in vanilla; increase speed to medium-high and beat until light and fluffy, about 45 seconds. With mixer running at low speed, add chocolate, then increase speed to medium and beat until combined, about 30 seconds, scraping down bowl once (batter may appear broken). With mixer running at low speed, add dry ingredients in 3 additions, alternating with sour cream (in 2 additions), beginning and ending with dry ingredients, and beating in each addition until barely combined. After final flour addition, beat on low until just combined, then stir batter by hand with rubber spatula, scraping bottom and sides of bowl, to ensure that batter is homogenous (batter will be thick). Divide batter evenly between prepared cake pans; spread batter to edges of pans with rubber spatula and smooth surfaces.
  5. 5. Bake cakes until toothpick inserted into center of cakes comes out clean, about 30 minutes. Cool in pans 10 minutes, then invert cakes onto greased wire rack; peel off and discard paper rounds. Cool cakes to room temperature before filling, about 1 hour. (Cooled cakes can be wrapped in plastic wrap and stored at room temperature for up to 1 day.)
  6. 6. TO ASSEMBLE: Stir toasted pecans into chilled filling. Set one cake on serving platter or cardboard round cut slightly smaller than cake, and second cake on work surface (or leave on wire rack). With serrated knife held so that blade is parallel with work surface, use sawing motion to cut each cake into two even layers. Starting with first cake, carefully lift off top layer and set aside. Using icing spatula, distribute about 1 cup filling evenly on cake, spreading filling to very edge of cake and leveling surface. Carefully place upper cake layer on top of filling; repeat using remaining filling and cake layers. If necessary, dust crumbs off platter; serve or refrigerate cake, covered loosely with foil, up to 4 hours (if refrigerated longer than 2 hours, let cake stand at room temperature 15 to 20 minutes before serving).

Step-by-Step

Assembling the German Chocolate Cake
1. With serrated knife, halve each cake evenly through equator.
2. Carefully lift off upper cake layer and set aside.
3. Evenly distribute about 1 cup filling on bottom cake layer.
4. Place next cake layer on top and repeat process.